eCommerce Tracking
Setting up eCommerce Analytics in Action Rabbit
To Track eCommerce Events Turn Event Tracking On.
![]()
Add a page to your WordPress website for registration confirmations
In your wordpress dashboard add a page that Jackrabbit registrants will see after they register successfully for a class. On this page write some encouraging message about how the person has succesfully registered and you are in awe of their technical accumen and prowess and you can’t wait to see them at your school.
Include this short code on the page:
[action_rabbit_confirmation]

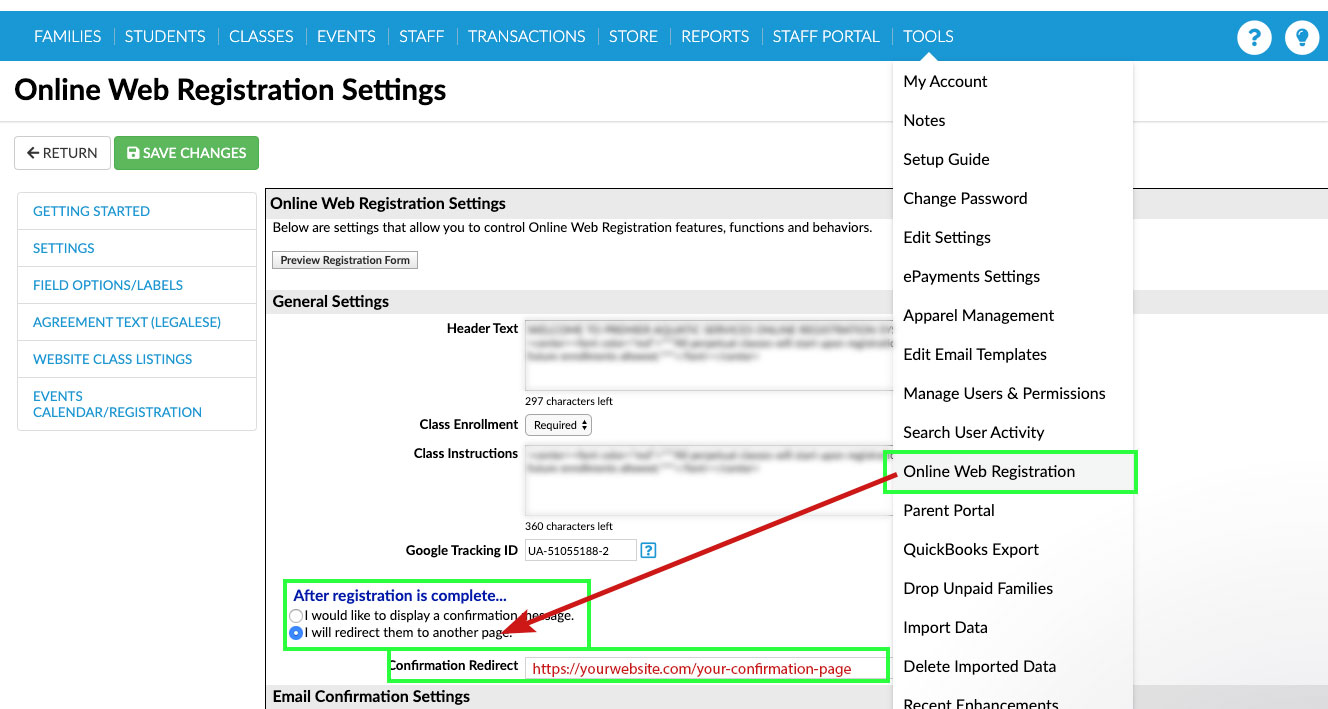
Tell Jackrabbit to redirect registrants to your new “registration success” page.
- Login to your Jackrabbit Class Dashboard
- In the main blue navigation at the top navigate to “Tools” > “Online Web Registrations”
- Section Titled “Online Web Registrations” look for the “After registration is complete…” area.
- Click the radio button next to “i will redirect them to another page”
- The “Confirmation Redirect” will appear. In the text input box paste in the URL of the WordPress Confirmation Page you just created.
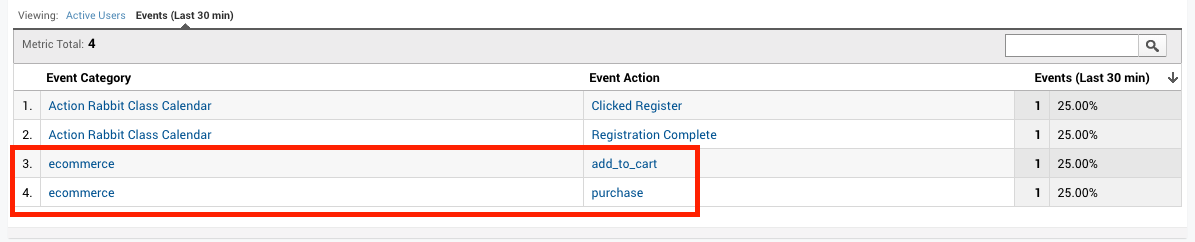
Make sure your Events are being sent through to Google Analytics.
- Go into the google analytics dashboard for the property & view that correlate with your tracking code & ID.
- Click “Real Time”
- Click “Events”
- Select “Events (Last 30 min)”
- eCommerce events will show up under event categories as “ecommerce“

Got somethin' to say?